A beautiful French pedicure in 3 steps

Are you going to be in the sun soon? Don’t forget to do your toenails. If you like simplicity, the French pedicure should please you.
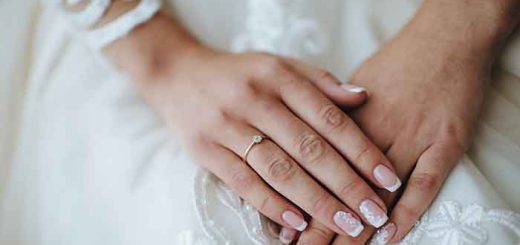
Did you think the French pedicure was out of date and old-fashioned? Think again ! It is modernized and made much more chic. No more thick white border at the end of the nails, it is worn thinner and preferably on short nails. Its advantage? It can be worn with everything and allows you to look great in our sandals in summer or in our socks in winter. On the other hand, avoid false nails at all costs and prefer to do it yourself quietly at home. Our instructions to follow.
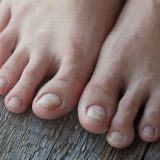
STEP N ° 1: TAKE CARE OF YOUR FEET
A French pedicure will be much more beautiful on smooth and soft feet. To do this, start with a foot bath. Immerse them in hot water and let them soak for at least 15 minutes. Once the horn is soft, scrape off the dead skin with a rasp or pumice stone, insisting on the heels.
The added tip: for soft feet all year round, a grain exfoliation performed once a week on this part of the body will limit the formation of calluses. And to limit the formation of horn, do not forget to hydrate your feet with a cream intended for this purpose. If the feet are really damaged, do not hesitate to apply it in a thick layer and then let it act all night in a pair of socks.
STEP 2: PREPARE YOUR NAILS
For a neat and clean pedicure, the nails should be properly filed and clipped. Ensure that you have professional pedicure and manicure set. However, they should be neither too short nor too long and preferably filed in a rounded shape so as not to injure themselves. Be careful to keep enough length to be able to use the white polish. Finally, to prepare the nails for applying the varnish, use a wooden stick to push back the cuticles. If their surface is streaked, use a polisher and then apply a repairing treatment. Before starting the French pedicure, install a toe retractor or cotton to make your task easier.
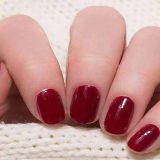
STEP N ° 3: PERFORM THE FRENCH PEDICURE
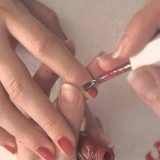
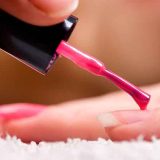
Apply a primer that will prevent yellowing and strengthen the hardness of the nails. Then proceed to the application of the white varnish on the naturally white part of the nail either with the varnish brush or with a fine nail art brush. If you wish, you can use adhesive strips to stick on the nail so as not to protrude. The right size for the French line: no more than 0.5 millimeters. Then cover your nails with a beige or pale pink varnish but avoid transparent varnish! Then finish with a top coat to make your French pedicure shine and hold as long as possible.
Good to know: there are now ready-made kits that contain the right nuances for a successful French pedicure.
Read also: Striated nails: the causes and solutions to remedy it